


Residential Wallpaper Installation Company in the GTA
Prestige Painting & Contracting provides professional residential wallpaper installation services across Toronto and the GTA. As trusted wallpaper specialists, we work with printed wallpaper, textured wallpaper, vinyl wallpaper, murals, feature walls, and custom wall designs. With experienced installers and access to premium materials, we deliver clean, precise wallpaper installation that enhances the look and feel of your home.
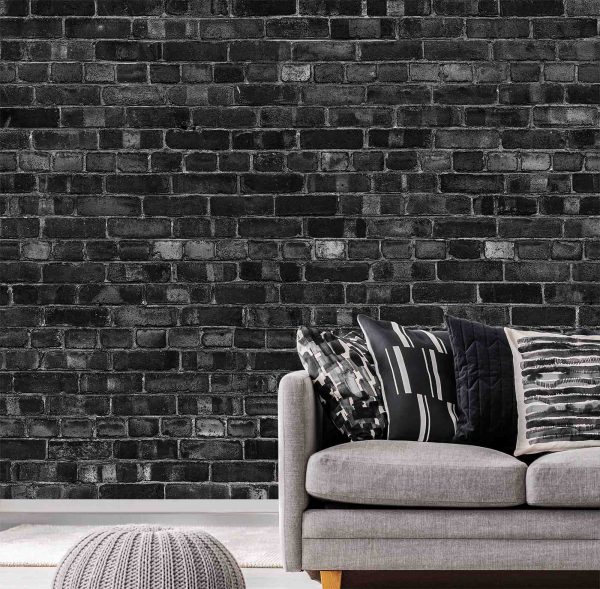
Wallpaper is a powerful design element that adds depth, texture, and personality to interior spaces. When installed correctly, wallpaper can create an elegant, long-lasting finish for bedrooms, living areas, kitchens, powder rooms, and feature walls. Investing in professional wallpaper installation helps ensure clean alignment, proper adhesion, and a refined final result.
Wallpaper Installation Services We Specialize In
Prestige Painting & Contracting offers residential wallpaper installation tailored to a wide range of interior styles. Our team helps homeowners select the right materials, patterns, and finishes to achieve a cohesive, polished look.
Printed wallpaper adds character and visual interest to interior spaces. Our installers ensure precise pattern matching and smooth application for a clean, professional finish.
Textured wallpaper introduces depth and dimension to walls. Proper preparation and installation are essential to achieving a seamless look, and our team has the expertise to handle these materials with care.
Vinyl wallpaper is a durable option commonly used in kitchens, bathrooms, and high-traffic areas. We install vinyl wallpaper with proper adhesives and techniques to help support long-lasting performance.
Accent wallpaper creates a focal point within a room. Our team assists with placement and design considerations to ensure feature walls complement the overall interior aesthetic.
Murals and custom wallpaper designs allow for creative, personalized interiors. We handle large-scale designs with careful alignment to ensure the final result looks cohesive and intentional.
Peel-and-stick wallpaper offers flexibility and modern style. Our professional installation ensures clean edges, proper adhesion, and a smooth finish that avoids bubbling or lifting.
Need Help Choosing Wallpaper?
We can help you choose wallpaper patterns, textures, and finishes that suit your home’s style. Contact our team to discuss your wallpaper installation project and request a free quote.


Our Team of Experts in Wallpaper Installation
Is wallpaper the right finish for your home? Often overlooked as a thing of the past, wallpaper can bring an elegant and distinctive look to modern interiors. As wallpaper specialists in the GTA, we help homeowners choose suitable designs and install wallpaper with careful attention to pattern alignment, surface preparation, and finish quality. We work with many types of residential wallpaper, including:
- Liner wallpaper
- Printed wallpaper
- Textured wallpaper
- Accent wallpaper
- Vinyl wallpaper
- Bamboo wallpaper
- Foil wallpaper
- Flock wallpaper
- Murals
- Grasscloth wallpaper
- Peel-and-stick wallpaper
Before starting your project, you can also explore our wallpaper portfolio for examples of completed work.
Wallpaper Installation Company in the GTA
We are a trusted wallpaper installation company serving Toronto and the GTA. Known for our attention to detail and design-focused approach, we help homeowners achieve elegant interiors using high-quality wallpaper products installed to professional standards. We also provide related interior painting services for rooms that need painted walls, trim, or ceilings completed alongside wallpaper installation.
Our Wallpaper Installation Process
Our structured wallpaper installation process is designed to deliver consistent quality, clean seams, careful pattern alignment, and reliable results on every project.
1. Initial consultation and design discussion
2. Wallpaper material selection and project assessment
3. Wall inspection and surface preparation
4. Precise layout planning and pattern alignment
5. Professional adhesive application
6. Careful wallpaper installation and seam finishing
7. Final detailing and surface inspection
8. Clean-up and walkthrough with the homeowner
Why Choose Prestige Painting & Contracting
If you need a wallpaper installation contractor for a residential project in the Greater Toronto Area, call Prestige Painting & Contracting today to book your free consultation.
1-year Warranty Certificate
Detailed specifications and proposals
Access to premium wallpaper materials
Daily communication and updates
On-site project manager
WSIB & licensed painters
FAQS
Wallpaper installation cost depends on the room size, wall condition, wallpaper material, pattern complexity, and whether old wallpaper needs to be removed first. Contact Prestige Painting & Contracting for a project-specific estimate.
Wallpaper removal cost depends on accessibility, number of layers, adhesive strength, wall condition, and type of wallpaper. Get in touch with us to request an estimate for wallpaper removal and wall preparation.
Wallpaper installation requires careful measuring, wall preparation, adhesive application, pattern alignment, smoothing, trimming, and seam finishing. Professional installation is recommended for expensive wallpaper, murals, textured materials, and feature walls.
Wallpaper installation steps usually include wall inspection, surface preparation, measuring, layout planning, adhesive application, wallpaper placement, smoothing, trimming, seam finishing, and final cleanup.
Painting is usually less expensive upfront, while wallpaper can offer more texture, pattern, and design impact. The better choice depends on your budget, room use, desired look, and how long you plan to keep the finish.
Contact Prestige Painting & Contracting to discuss wallpaper options, installation details, and the right finish for your home. Request a wallpaper installation quote.


